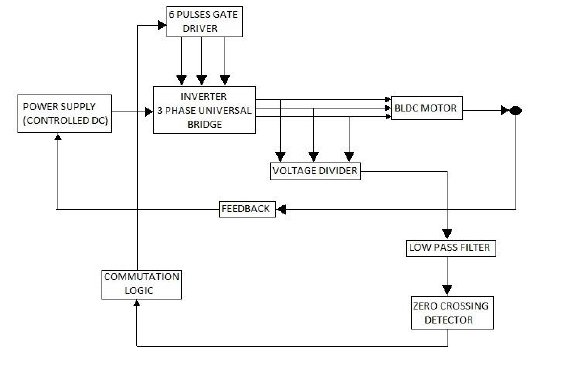
Figure 9:
Block Diagram of Overall Arrangement