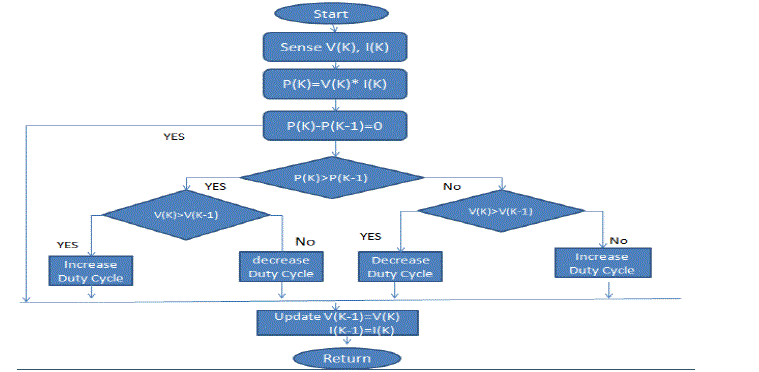
Figure 4:
Flow chart of P&O Algorithm