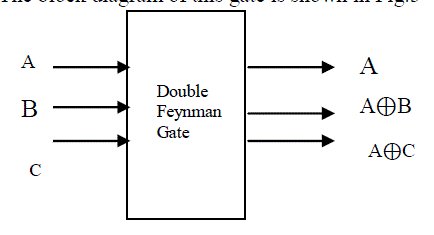
Figure 3:
Block diagram of Double Feynman Gate