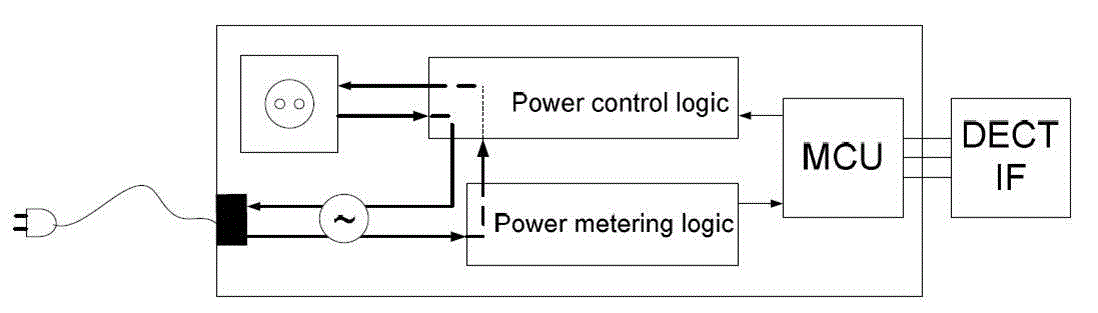
Fig. 3
Block diagram of the Energy Management Device